
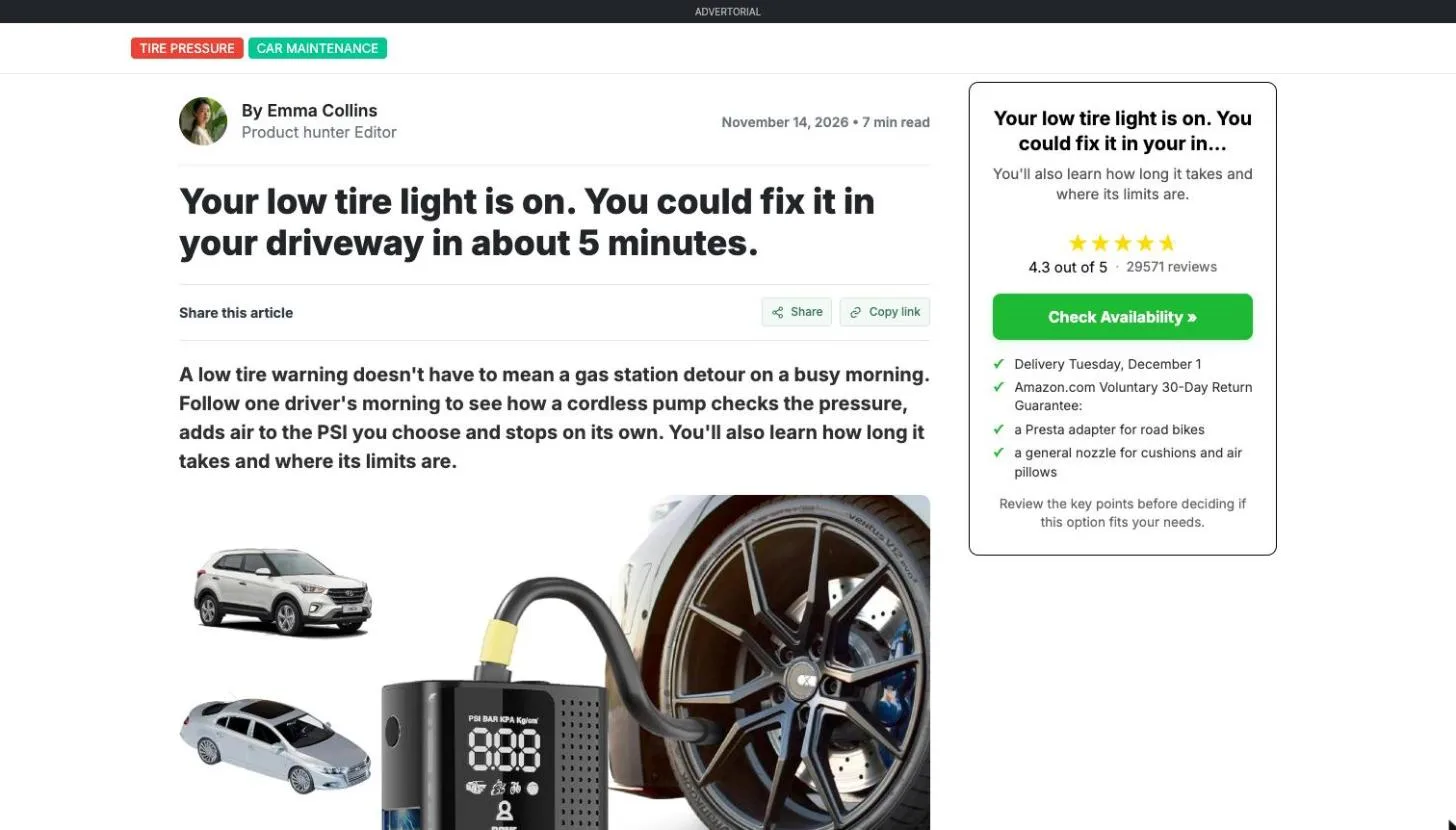
This tutorial follows one real example from start to finish: an advertorial for the Airmoto portable tire inflator, sending readers to a Shopify store. Every screen below is what you will see in your own account.
You need a LandGoose account and one product or offer. A product page link helps, but you can also type the details yourself. If you want the thinking behind a good first test (one offer, one audience, one angle), read Getting Started with LandGoose first. This page shows the clicks.
Step 1: Open the Studio and choose the format
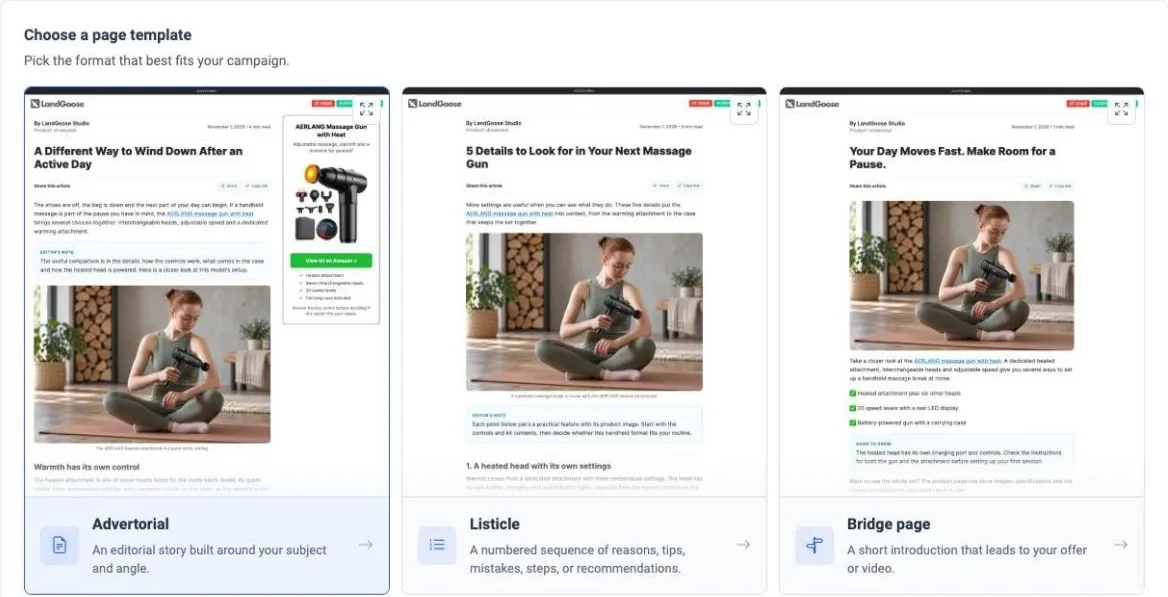
Click New Page or Studio in the sidebar. The Studio opens with the page formats side by side: advertorial, listicle, bridge page, form page, pre-checkout and product page. Each card shows a full preview, so you can see the layout before you start.
For this example, choose Advertorial: an editorial story built around one product and one angle.
Step 2: Set the page goal and add your product
The guided Studio has three short steps: Start, Angle and Media.
On Start, choose the page goal:
- Offer clicks when the page sends readers to a product page, a store or an affiliate offer.
- Collect leads when the page ends with a form.
Then paste the link to your product page and click Read page. LandGoose reads the page and fills in the subject and key facts for you. Your own store page, a marketplace listing or an offer page all work. In this example we used the product's listing.

No product page yet? Click Enter details manually and describe the offer in your own words. Review the key facts either way: anything wrong here will show up in the copy.
Step 3: Pick an angle
Click Find angles. After a short wait, the Studio suggests several angles for the same product. Each one is a different reason for the reader to care: a story, a comparison, a practical how-to, a gift idea.

Pick the angle that matches the ad you will run. Here we chose the story: "Your low tire light is on. You could fix it in your driveway in about 5 minutes." It fits a short video ad about a dashboard warning light.
You can edit any angle, ask for more, or write your own. You can also choose the content length: short, medium or long.
Step 4: Add product images
On Media, LandGoose finds the images on your product page. Tick the ones you want in the article. The first one becomes the main image. You can also upload your own files, use your media library, and add your logo.
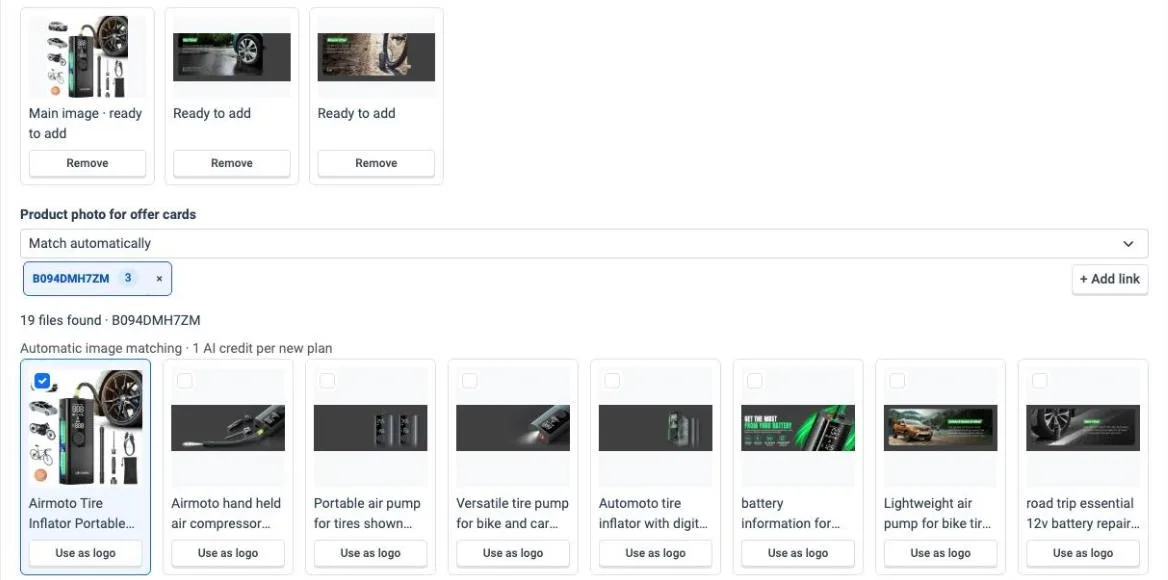
Images are optional. You can generate without them and add them later in the editor.
Step 5: Generate the page
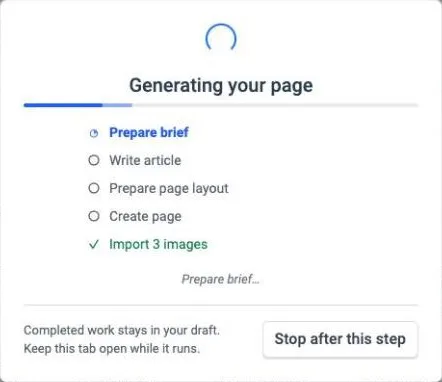
Click Generate page. LandGoose writes the article and builds the page around it. A complete advertorial takes about 5 minutes. Keep the tab open while it runs, and your progress stays in the draft.
Step 6: Review and edit in the editor
The finished page opens in the editor. On the left: content, media and settings. On the right: the page as readers will see it.
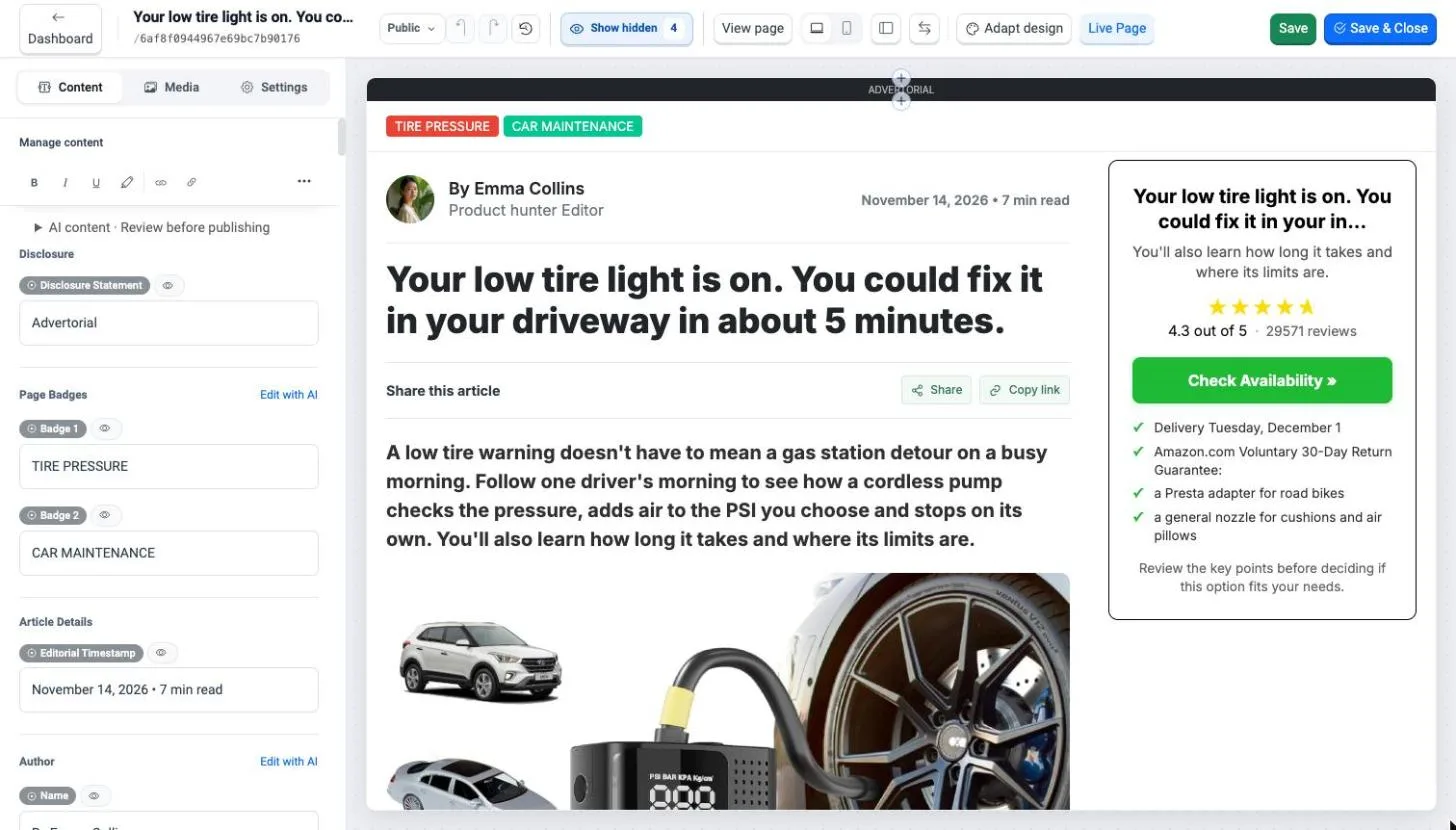
Click any block on the page to edit it. For text, you can type the change yourself or use Edit with AI to rewrite just that block.
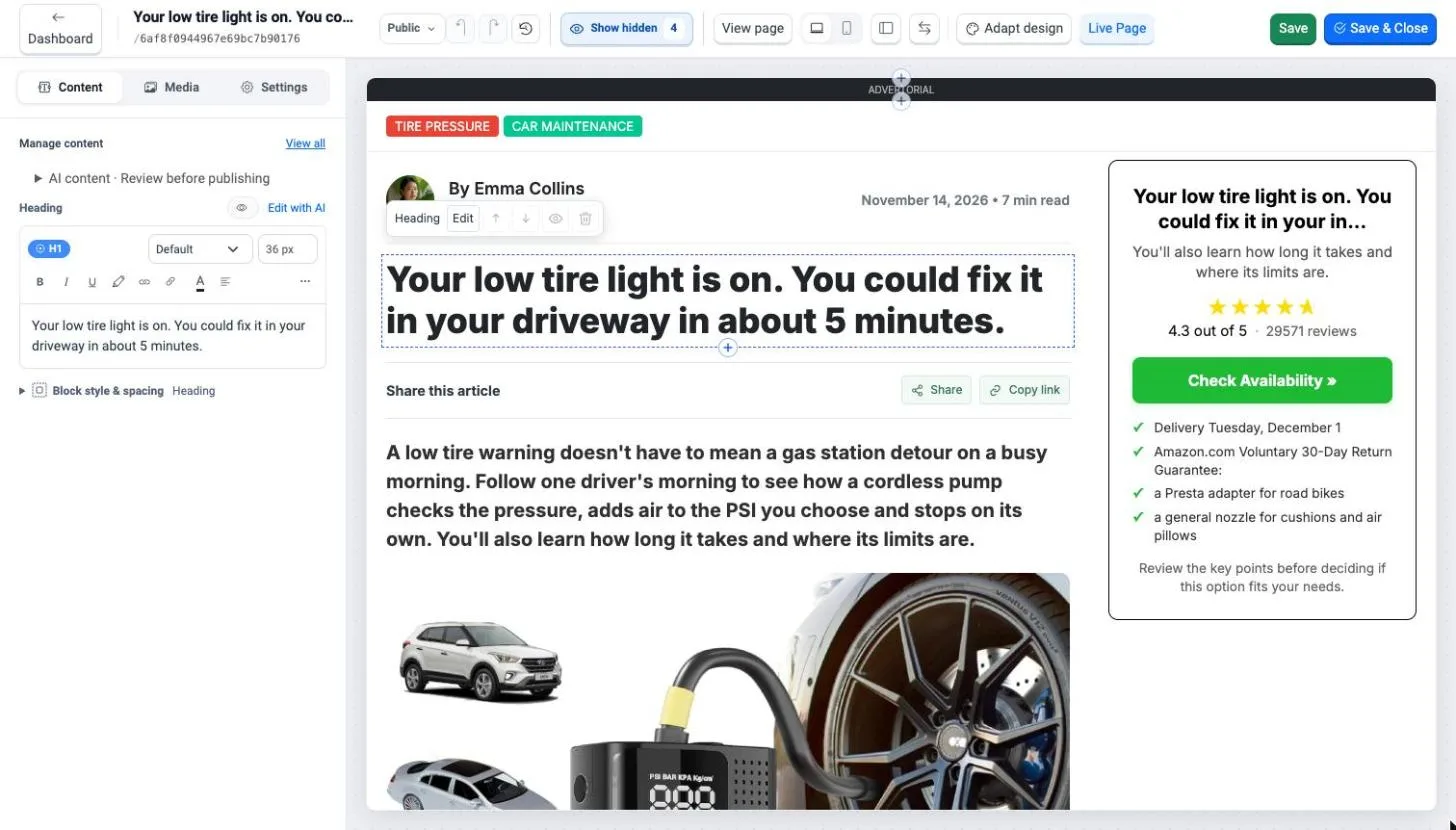
Read it like an editor before you publish. Check the headline against your ad, every product fact, prices and delivery promises, and anything that could affect trust. Generated copy is a strong draft, and you are the last check.
Step 7: Point every button to your store
By default, buttons follow the product link you started with. To send all traffic to your store, open Settings → Links & forms → Update all links, turn on One destination for all links, and paste the destination, such as your product page, a cart link or your tracking link.
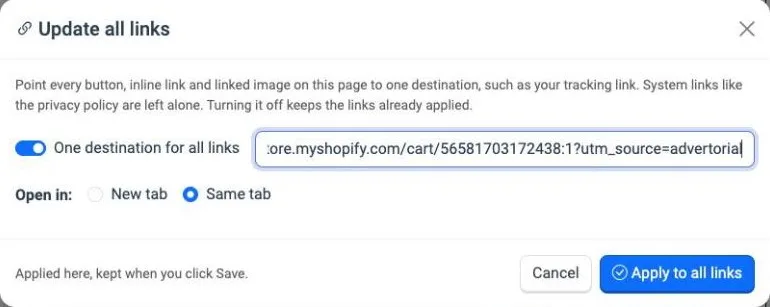
In this example, every button opens the Shopify cart with the product already added. System links, like the privacy policy, are left alone.
Step 8: Check the mobile version
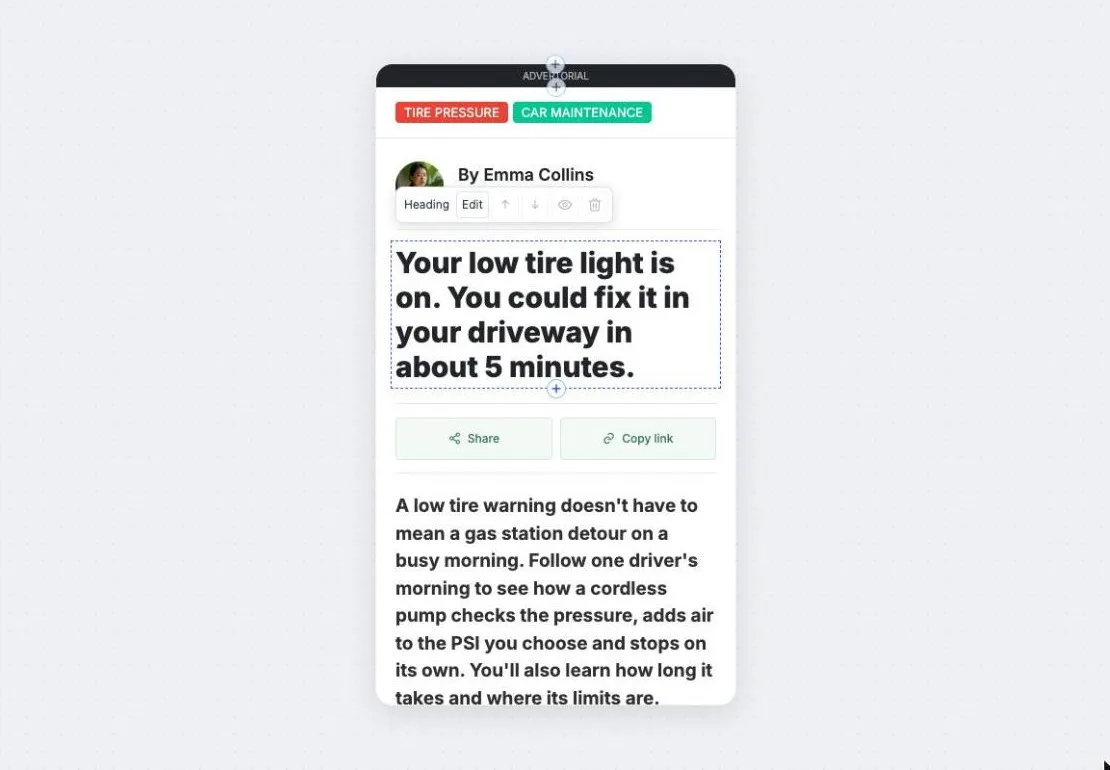
Most advertorial traffic comes from phones. Switch the preview to mobile with the phone icon in the top bar and scroll the whole page once.
Step 9: Publish and open the live page
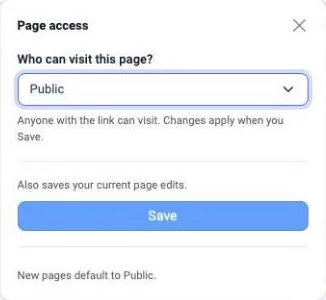
Click Save. Page access controls who can visit the page: public, or private while you review. Your account sets the default for new pages.
Open the live page with Live Page, and click through the buttons once to make sure they land where you expect. Pages are served on your LandGoose subdomain, or on your own domain once you connect one.
What to do next
- Duplicate the page to test a second angle. Change one thing at a time, such as the angle or the headline, so you know what made the difference. See how to test advertorial angles.
- Build the full funnel. Add a product page and a pre-checkout with bundle offers between the advertorial and your checkout. The Facebook ads to advertorial guide explains the flow.
- Translate it. Once a page works in one market, translate it into any of 33 languages.
Common Questions
Do I need a product page link?
No. It saves time, because LandGoose fills in the facts for you. You can also click Enter details manually and describe the offer yourself.
Can I use my own copy instead of generated copy?
Yes. The Studio also lets you start from your own copy and turn it into a page.
How long does it take?
About 5 minutes from product link to finished page, plus the time you spend reviewing and editing.
Does it work for Shopify stores?
Yes. Point the buttons to your product page, a cart link or a pre-checkout page. Brands and dropshippers use the same flow.